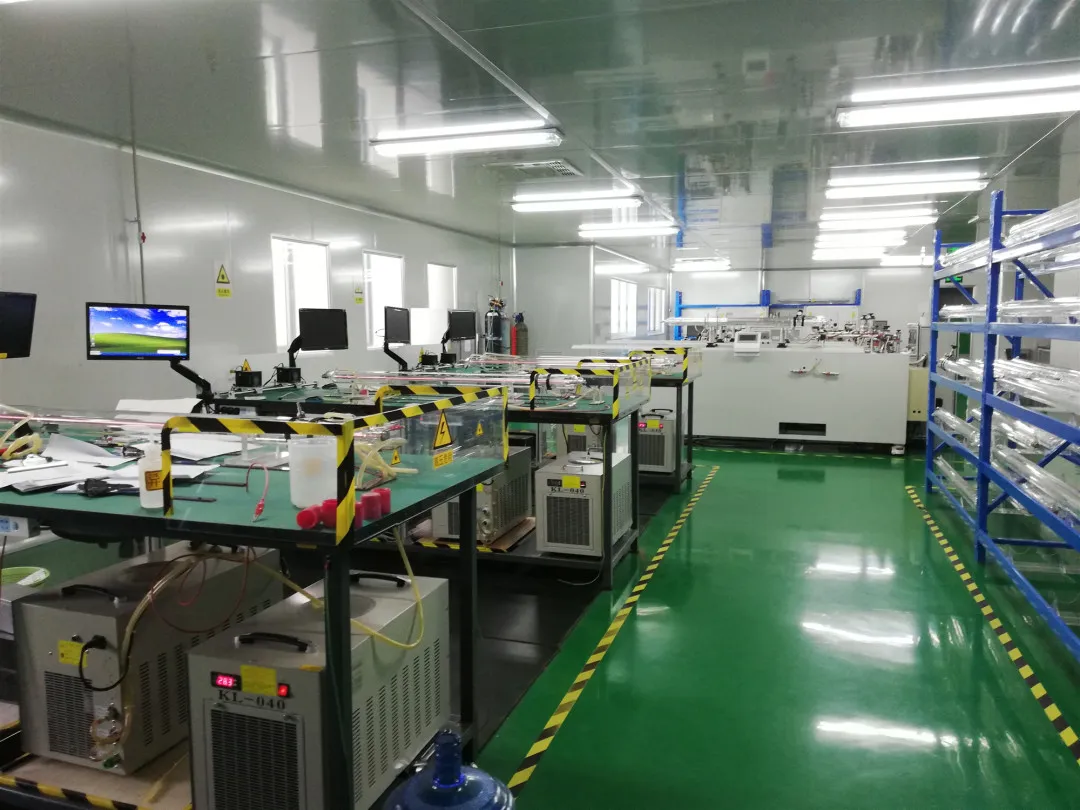
“Hengkuai Academy”: The Definitive DC CO2 Laser System Troubleshooting Guide

As a premier source manufacturer of CO2 laser tubes, Hengkuai Group understands that equipment uptime is the lifeblood of industrial manufacturing. To assist field engineers and maintenance technicians in rapidly diagnosing and resolving system faults, we have consolidated our engineering expertise into this Standard Operating Procedure (SOP) for troubleshooting DC CO2 laser systems.

01 Receiving & Initial Commissioning Faults

Symptom Potential Root Cause(s) Corrective Action(s) Action Owner
Compromised Packaging Upon Delivery

1. Substandard packaging prior to dispatch.


2. Mishandling during freight transit.

1. Manufacturer: Continuously improve structural packaging design.


2. Customer: Document the exact extent of damage on the Bill of Lading (BOL) prior to signing. Open the crate to inspect internal components. Take detailed photographs and notify Hengkuai Group within 72 hours.

1. Hengkuai


2. Customer

Laser Tube Fires at Full Power & Ignores Current Demand Settings The Low Voltage (LV) return wire from the laser tube is incorrectly connected or grounded. Power down the High Voltage Power Supply Unit (HV PSU). Verify the LV return wiring to ensure it is connected to the correct PSU terminal and is completely isolated from any chassis ground points. Customer
Laser Tube Fails to Fire or Ceases Operation

1. No AC mains supply reaching the HV PSU.


2. Faulty control/demand signal bridging to the HV PSU.


3. Catastrophic failure of the HV PSU.


4. Open circuit in the current feedback loop.


5. Complete failure of the laser tube.


6. System safety interlocks activated (eg, water flow sensor, door switch).

1. Verify breaker panels and restore AC power to the HV PSU.


2. Diagnose the CNC control board to ensure consistent “PSU ON” and analog demand signals.


3. Replace the HV PSU .


4. Inspect and re-terminate all electrical loop connections.


5. Refer to the “Failed Laser Tube” section.


6. Inspect machine-level interlocks and clear faults.

1, 2, 4, 6: Customer


3: Hengkuai


5: TBA

02 Output Performance & Cutting Quality

Symptom Potential Root Cause(s) Corrective Action(s) Action Owner
Poor Cutting Speed or Substandard Material Penetration

1. Degraded beam delivery from the laser head to the substrate.


2. Misaligned beam combiner within the optical path.


3. Premature laser tube failure.


4. Degraded beam mode quality (TEM00 loss) resulting in low density.


5. Unstable power output fluctuation.


6. Mechanical failure of the CNC gantry/motion system.

1. Inspect and clean the entire optical delivery path (mirrors & focal lens).


2. Refer to the “Beam Combiner Misalignment” section.


3. Refer to the “Failed Laser Tube” section.


4. Refer to the “Low Output Power” section.


5. Refer to the “Power Instability” section.


6. Diagnose and repair mechanical drive components (belts, rails, servos).

1, 6: Customer


2: Hengkuai


3, 4, 5: TBA

Low Output Power & Distorted Beam Quality

1. Tube has reached the end of its operational lifespan.


2. Input operating current is set too low.


3. Laser is inadvertently operating in PWM/Pulse modulated mode instead of CW (Continuous Wave).


4. Optical contamination on the tube’s output window.


5. Mechanical stress applied to the tube body due to improper mounting.


6. Hostile environment (eg, high ambient or coolant temperatures).


7. Output coupler housing requires micrometer adjustment.


8. Extreme thermal buildup on the output coupler (Ambient +30°C).

1. Process an RMA for manufacturer refurbishment or replace with a new tube.


2. Calibrate the analog demand signal to the HV PSU.


3. Reprogram the control software to ensure strictly DC current output mode.


4. Meticulously clean optics with spectroscopy-grade solvents. Retune if equipped.


5. Consult the installation manual; loosen clamps and reset to eliminate stress.


6. Adjust chiller setpoints and improve workshop HVAC ventilation.


7. RMA: Return to Hengkuai for proprietary optical realignment.


8. RMA: Return the unit immediately for deep diagnostic repair.

1-6: Customer


7, 8: Hengkuai

Severe Power Instability (Fluctuations > ±8% at Full Power)

1. Electrical noise/fluctuation in the current control signal line.


2. Unstable current generation internal to the HV PSU.


3. Excessive coolant or ambient workshop temperatures.


4. Erratic coolant temperature cycling from a faulty chiller.


5. Particulate contamination on the output coupler.


6. Mechanical loosening of the output coupler tuning screws.


7. Extreme thermal buildup on the output coupler (Ambient +30°C).

1. Use an oscilloscope to isolate and shield the signal line.


2. Hot-swap the HV PSU for cross-verification.


3. Lower the chiller setpoint and reduce ambient workshop heat.


4. Service the industrial chiller’s compressor/thermostat logic.


5. Clean the optical lens strictly following cleanroom procedures.


6. RMA: Return to Hengkuai for factory retuning.


7. RMA: Return the unit immediately for repair.

1, 3-5: Customer


2: TBA


6, 7: Hengkuai

03 Optical Path & Hardware Integrity

Symptom Potential Root Cause(s) Corrective Action(s) Action Owner
Beam Combiner Misalignment (Non-coaxial beams, high power loss)

1. Incorrect installation geometry within the machine chassis.


2. Physical obstructions clipping the laser beam path.


3. Flying optics (mirrors) shifting from their calibrated zero positions.


4. Inherent distortion of the laser tube’s spatial beam mode.


5. Contaminated beam combiner or primary reflection mirrors.


6. Thermal/physical destruction of mirror coatings.

1. Recalibrate the tube’s physical mounting position and adjust clamping torque.


2. Perform a complete beam alignment check (tape-burn test) and remove obstructions.


3. Re-align the entire flying optics kinematics.


4. RMA: Return the tube to Hengkuai for optical resonator retuning.


5. Clean optics with anhydrous ethanol/acetone or replace if pitted.


6. Replace the damaged optical elements entirely.

1, 5: Customer


2, 3, 4: Hengkuai


6: TBA

Catastrophic Physical Rupture of the Glass Tube

1. Kinked hoses or blocked plumbing restricting coolant flow.


2. Severe mineral scale buildup within the glass coolant jacket.


3. Degraded chiller pump resulting in inadequate flow rates (GPM).


4. Dry-firing the laser (chiller off / flow switch bypassed).


5. Coolant temperature set too low, causing thermal shock or condensation.


6. Freezing ambient temperatures causing coolant expansion (ice).


7. High-voltage arcing directly breaching the glass envelope.


8. Collat​​eral thermal shock from nearby external high-voltage arcing.


9. Inherent manufacturing defect in glass annealing.


10. Blunt force trauma or external mechanical stress during handling.

Isolate Equipment: Safely crate the damaged laser tube and initiate an RMA to return it to Hengkuai Group for comprehensive Failure Analysis (FA).

1-6, 10: Customer


7, 8, 9: Hengkuai

Complete Failure or Erratic Operation of the HV PSU

1. Conductive dust bridging components on the PCB logic boards.


2. High humidity or condensation causing PCB short circuits.


3. Severe AC mains voltage sags or surges.


4. Incorrect wiring topology on the AC input block.


5. Open or reversed wiring on the output current feedback loop.


6. Poor connection at the HV anode causing an open circuit and arcing.


7. Internal component failure (manufacturing defect of the PSU).

1. Purge the PCB with dry, compressed air; request RMA if permanent damage occurred.


2. Disconnect power, dehumidify the PCB; request RMA if dead.


3. Verify incoming voltage with a multimeter. Install a power conditioner; request RMA if dead.


4. Rewire according to schematics; request RMA if dead.


5. Correct the feedback loop wiring; request RMA if dead.


6. Re-terminate the HV anode connection with proper dielectric insulation; request RMA if dead.


7. Request RMA for Hengkuai factory warranty repair.

1-6: Customer


7: Hengkuai

STAY IN THE LOOP

Subscribe to our free newsletter.

Don’t have an account yet? Get started with a 12-day free trial

Leave A Comment

Related Posts